Cherry Studio
About Cherry Studio
Cherry Studio is a multi-model service desktop client that is compatible with Windows, Mac, and Linux. It does not require complex setup and integrates mainstream LLM cloud services, AI Web services, supports local model running, and provides personalized features such as Markdown rendering, agent creation, translation, etc. The interface is user-friendly and flexible, bringing efficient AI interaction experiences.
Follow the installation and configuration steps below:
Installation and Configuration Steps
You can install Cherry Studio in the following two ways:
Obtain Your Access Token
- Log in to the MoArk official website (or register an account if you don't have one).
- Navigate to the Dashboard, click Settings in the top-right corner, and select Access Tokens.
- Generate a new token and copy it for later use.
Configuration Guide
-
Click on the settings icon in the lower left corner and then click
+ Addto add the MoArk model service.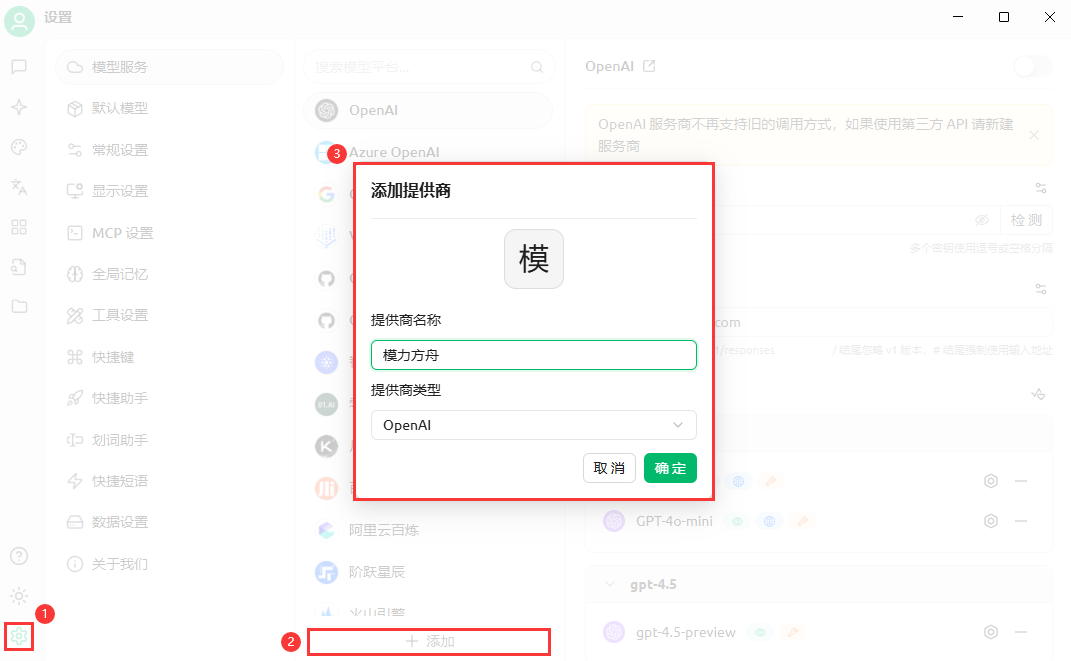
-
Enter the previously copied access token and API address.
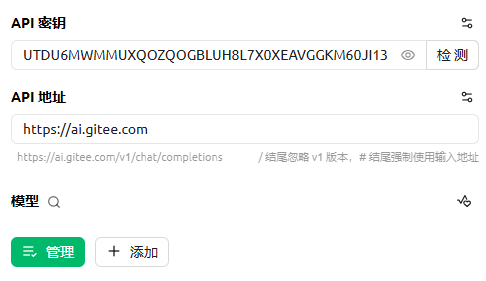
-
Click
+ Addto add the model, and you can view existing models in AI Model Square.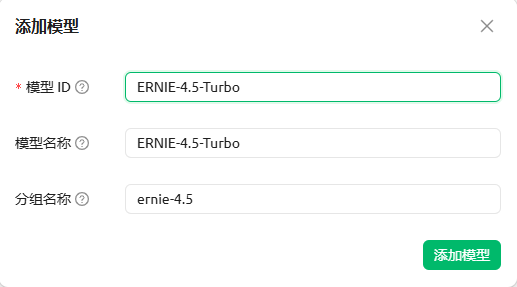
-
After adding, you can return to the conversation page to start conversation, and you can also switch models by clicking on the model name in the top menu.

Using Embedding Model Service
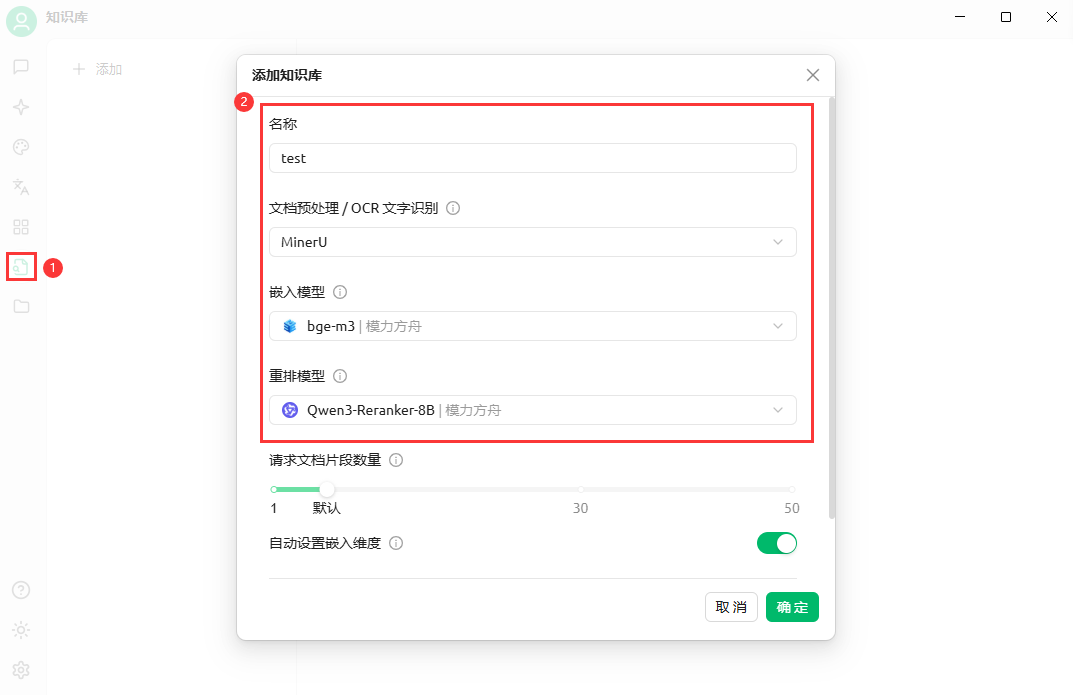
Creating a Knowledge Base
-
In CherryStudio's left toolbar, click the knowledge base icon to enter the management page;
-
Click
+ Addto start creating a knowledge base; -
Enter the name of the knowledge base, select the pre-added embedding models, and complete the creation. For example, using bge-m3 and Qwen3-Embedding-8B.
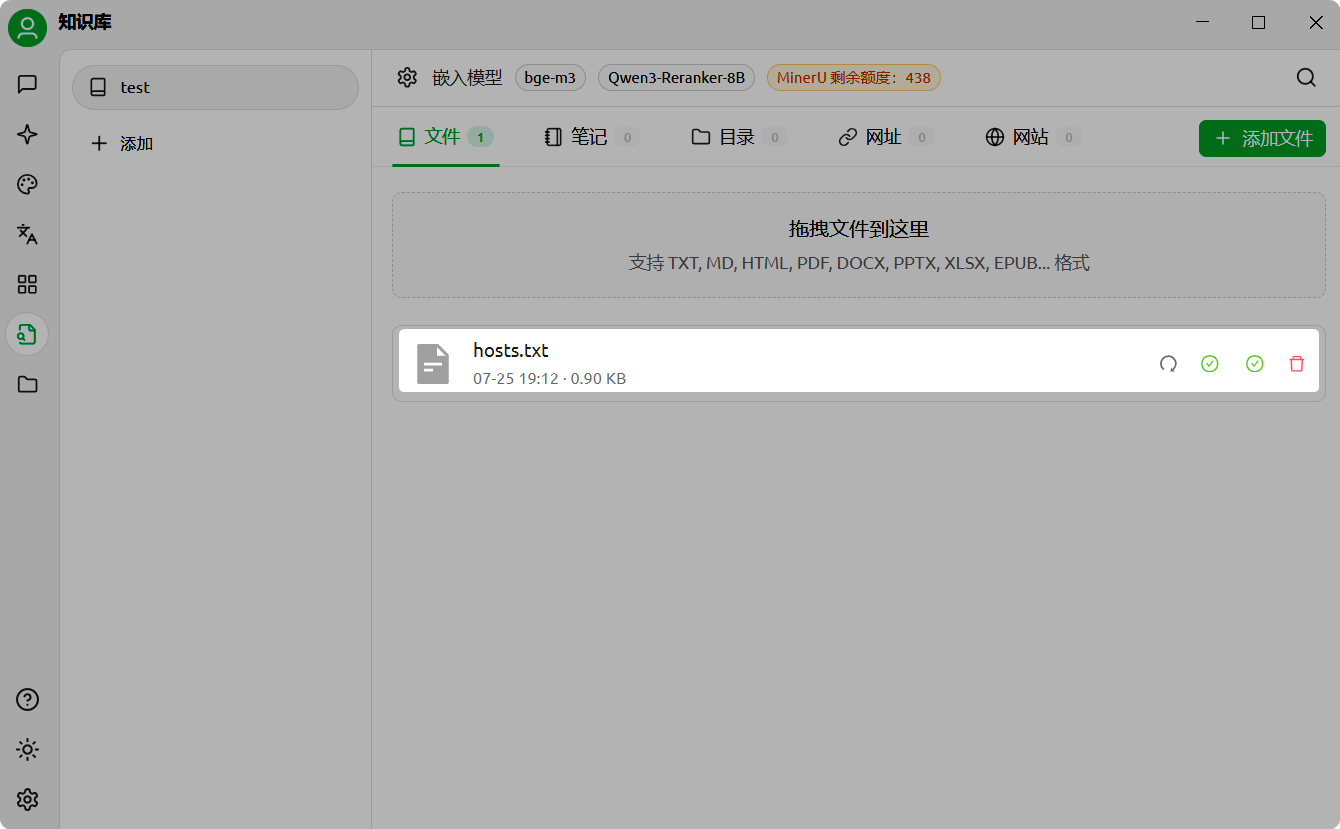
Adding Files and Vectorization
-
Select supported file formats, such as pdf, docx, pptx, xlsx, txt, md, mdx, etc., and drag and drop them into the file list;
-
After uploading, the system will automatically perform vectorization processing. When the display is complete (green ✓), it means vectorization is complete.
Adding Multiple Data Sources
CherryStudio supports multiple ways to add data:
-
Folder Directory: Add the entire folder directory, and the files in the directory that support the format will be automatically vectorized;
-
Website Link: Support website urls, such as https://docs.molifangzhou.com/introduction;
-
Sitemap: Support xml format sitemaps, such as https://docs.molifangzhou.com/sitemap.xml;
-
Plain Text Notes: Support custom content input in plain text.

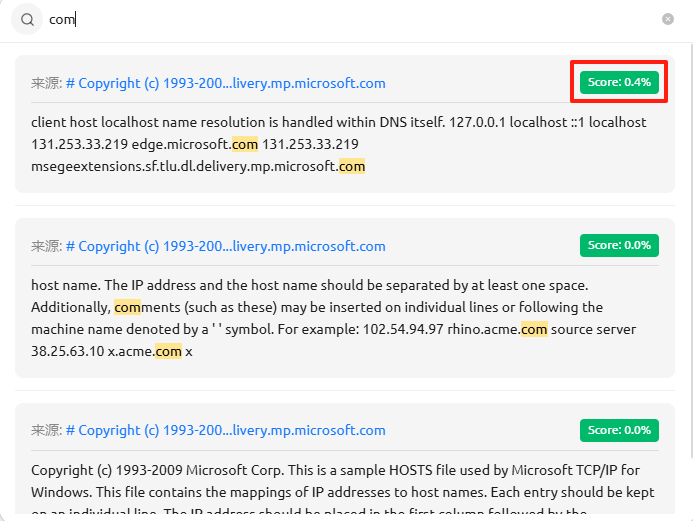
Searching the Knowledge Base
After vectorization is complete, you can start querying:
-
Click the search knowledge base button at the bottom of the page;
-
Enter the query content;
-
Present the search results;
-
Display the matching score of that result.